

TL;DR
– Wings cook in under an hour and work on a gas or charcoal grill.
– Party wings (pre-split drumettes and flats) save you the knife work and cook evenly.
– Thaw frozen wings fully in the fridge first, or the skin burns before the center is done.
– Plan on about a pound of wings per person as a main dish.
Weekend cookouts need a dish that feeds a crowd, cooks in under an hour, and tastes good with or without a lot of fuss. BBQ chicken wings fit all three. They are small enough to cook quickly, the skin takes smoke and char well, and you can season them for any taste, from sweet honey glaze to a hot, vinegary sauce.
This guide walks through the whole process in order: what to buy, how to prepare the wings, how to set up your grill, how to know when they are done, and what to serve alongside them. The method works on a gas or charcoal grill, and the temperatures and timings below give you a reliable starting point you can adjust to your own setup.
Gathering Your Ingredients and Tools
Choosing the wings
A whole chicken wing has three parts: the drumette, the flat, and the tip. Many stores sell “party wings,” which are already split into drumettes and flats with the tips removed. They save you a knife job and cook evenly because the pieces are similar in size. If you buy whole wings, cut off the tips (they burn easily and have little meat) and split each wing at the joint.
Fresh wings should look moist and pale pink, with no sour smell. Frozen wings are fine, but thaw them completely in the refrigerator first, which usually takes a day. Wings that are still icy in the middle will have burnt skin by the time the center is cooked.
For quantity, plan on roughly a pound of wings per person if they are the main dish, and less if you are serving plenty of sides.
Seasoning and sauce
You need two things: a dry rub and, if you like a sticky finish, a sauce. A simple rub can be made from pantry staples:
-
Salt and black pepper
-
Smoked paprika
-
Garlic powder and onion powder
-
A small amount of brown sugar
-
Cayenne, if you want heat
Keep the sugar in the rub low. Sugar burns on a hot grill, and sweet sauces burn even faster. That is why the sauce goes on near the end of cooking, as covered below.
Grill and tools
Both gas and charcoal work. Gas gives you steady, adjustable heat, which makes the two-zone setup below easy. Charcoal gives a stronger smoky flavor, and you can add a chunk or two of hardwood for more. Choose whichever grill you are comfortable running.
Beyond the grill, gather these before you start:
-
Long-handled tongs
-
An instant-read thermometer (see our guide to the right grilling thermometer for the way you actually cook if you are choosing one)
-
A wire rack set inside a rimmed baking sheet, for drying the wings
-
A large bowl for tossing wings in sauce
-
A basting brush
-
A clean platter for the cooked wings
Food safety
Raw chicken carries bacteria that spread easily, so a few habits matter. Wash your hands after handling raw wings. Use a separate cutting board and utensils for raw chicken. Never put cooked wings back on the platter that held the raw ones. Keep the wings refrigerated until you are ready to season and cook them.
The Perfect BBQ Technique: From Preparation to Cooking
Step 1: Dry the wings and season them
Crisp skin starts with dry skin. Pat the wings thoroughly with paper towels, then toss them with your dry rub. For extra crispness, add a little aluminum-free baking powder to the rub, about a teaspoon per pound of wings. It helps the skin brown and dry out as it cooks.
Arrange the seasoned wings in a single layer on the wire rack and refrigerate them uncovered for at least a few hours, or overnight if you have the time. The cold, dry air of the refrigerator dries the skin further, and the salt has time to season the meat.
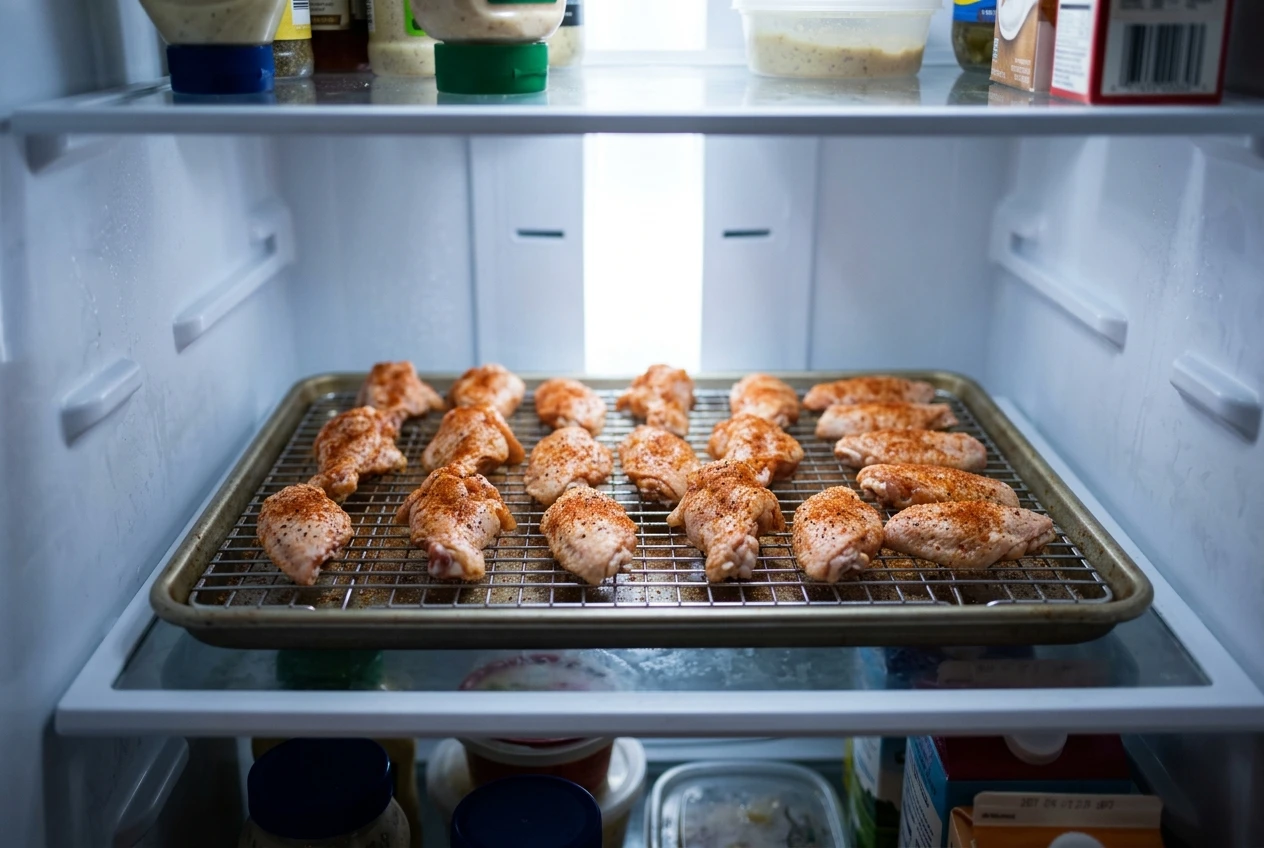
This approach uses a dry rub rather than a wet marinade on purpose. Wet marinades leave moisture on the skin, which works against crispness. If you want a wet flavor, put it in the sauce at the end.
Step 2: Set up the grill for two zones
Two-zone cooking means one side of the grill has the heat on and the other side does not. On a gas grill, light the burners on one side and leave the other side off. On a charcoal grill, bank the coals on one side.
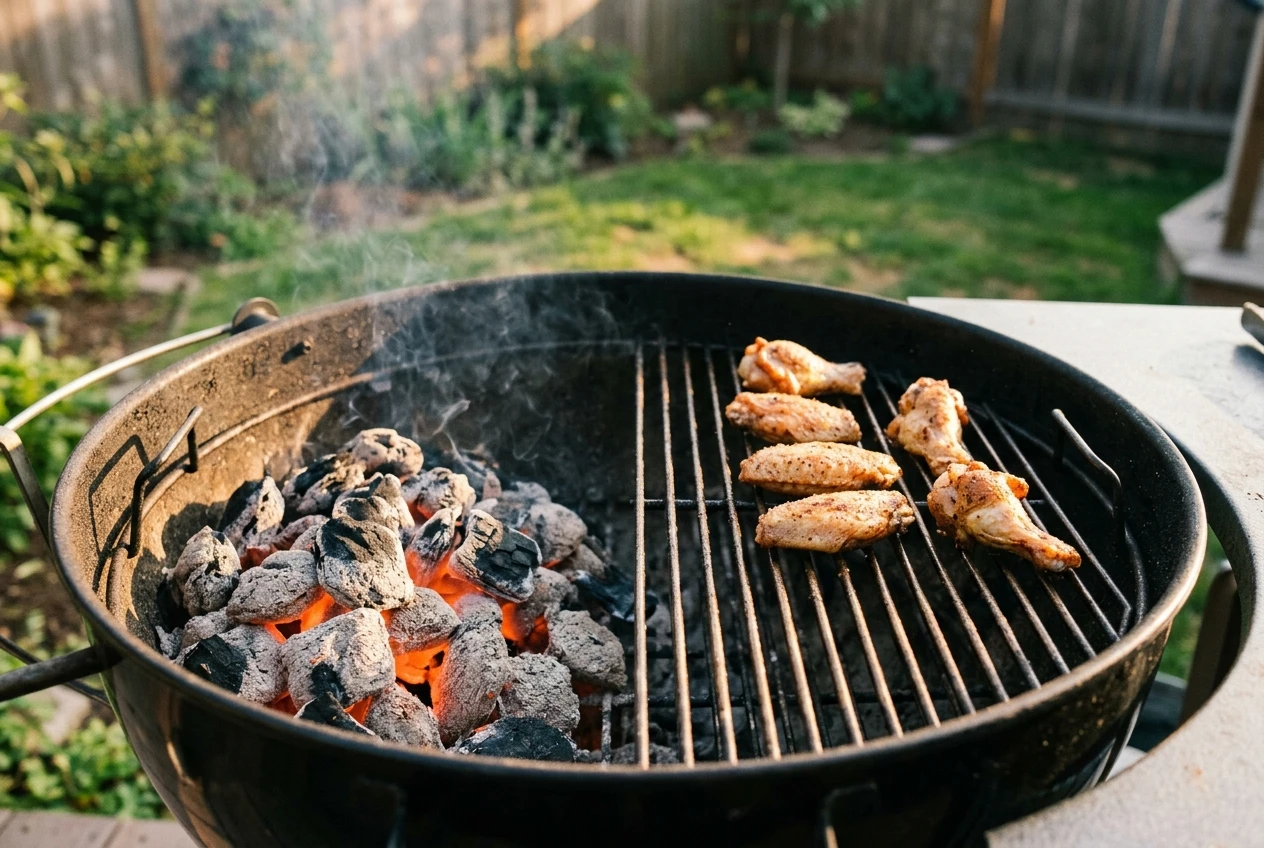
The reason to do this is that wings have a lot of fat under the skin. Over direct flame that fat drips, flares up, and scorches the skin before the meat is cooked through. Cooking on the cool side first lets the fat render gently, and the hot side gives you a quick finish. If you want a full walkthrough of the setup, read how to set up a two-zone fire on your gas grill. Our piece on direct grilling techniques also covers what to do on the hot side.
Preheat the grill with the lid closed until it holds a steady 375 to 400°F on the thermometer, then clean the grates and oil them lightly. Clean, oiled grates keep the skin from sticking and tearing.
Step 3: Cook the wings
Place the wings on the cool side of the grill, skin side up, with a little space between them, and close the lid. Cook for about 25 to 35 minutes, turning them once or twice. The exact time depends on the size of the wings and how well your grill holds heat, so go by temperature and appearance rather than the clock alone.
When the skin looks set and lightly golden, move the wings to the hot side. Cook them there for a few minutes per side, watching closely and turning often. This final sear browns and crisps the skin. If a flare-up starts, move the wings back to the cool side until it settles.
Step 4: Check the temperature
Chicken is safe to eat at an internal temperature of 165°F. Insert your thermometer into the thickest part of the wing without touching the bone.
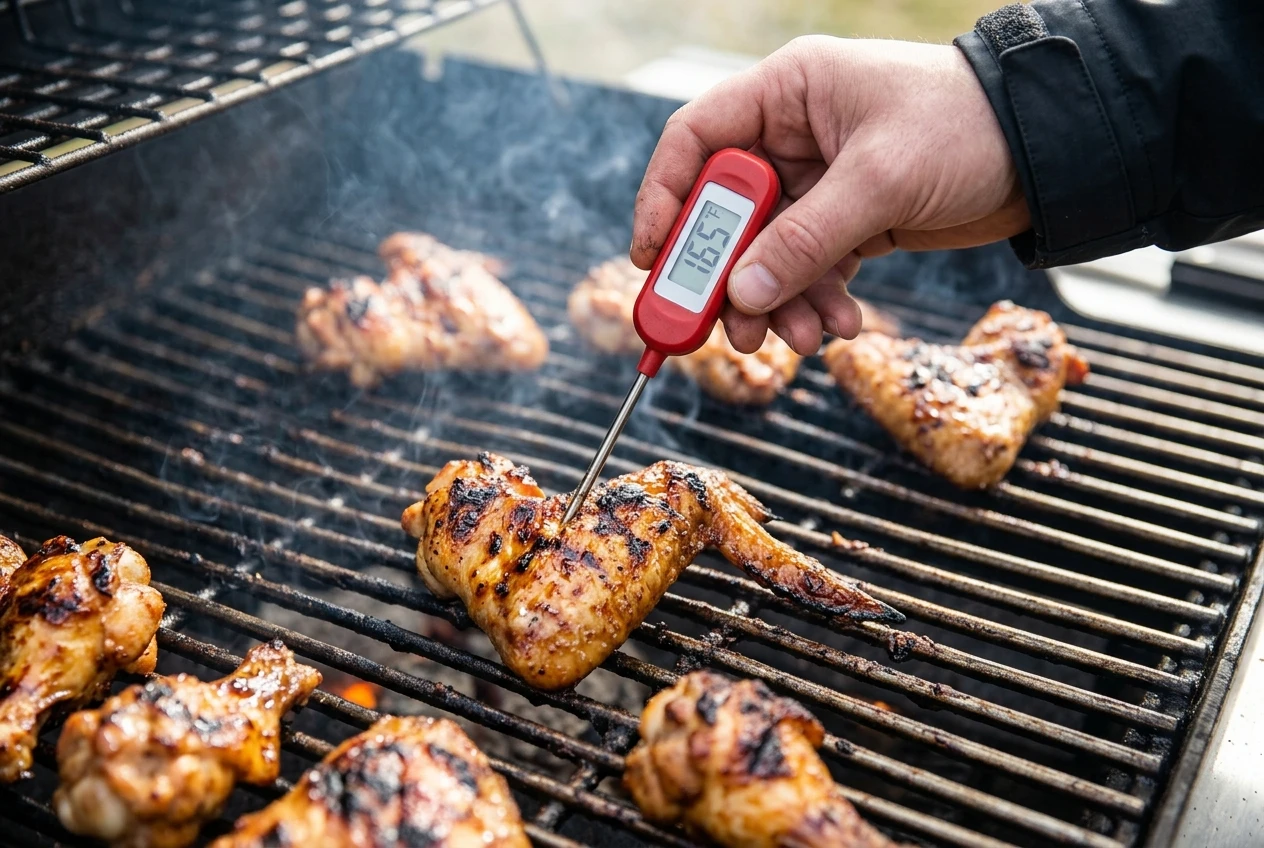
Wings are a forgiving cut, and many cooks take them higher, to around 175 to 185°F, because the extra time breaks down connective tissue and makes the meat more tender while the skin stays crisp. Either way, 165°F is the minimum, so check a few wings from different spots on the grill rather than just one.
Step 5: Sauce the wings
Put the cooked wings in a large bowl, add sauce, and toss until they are evenly coated. This keeps the sauce from burning on the grate and lets you control how much goes on. If you want a sticky, caramelized glaze, brush the sauce on during the last two or three minutes on the hot side, and turn the wings often so the sugar does not scorch.
Serve the wings right away. Skin that was crisp when it left the grill softens as the wings sit under sauce.
Other ways to cook wings
The grill is the best choice for smoky flavor, but it is not the only option. In a 425°F oven, wings on a wire rack over a baking sheet will crisp well, and they are a good choice in bad weather. You can also finish oven-cooked wings under the broiler for a minute or two. Deep-frying gives the crunchiest skin, but it takes more oil and cleanup. For a backyard cookout, the grill is usually the most enjoyable choice, and it frees up your kitchen.
Serving Suggestions and Pairing Delights
Presentation
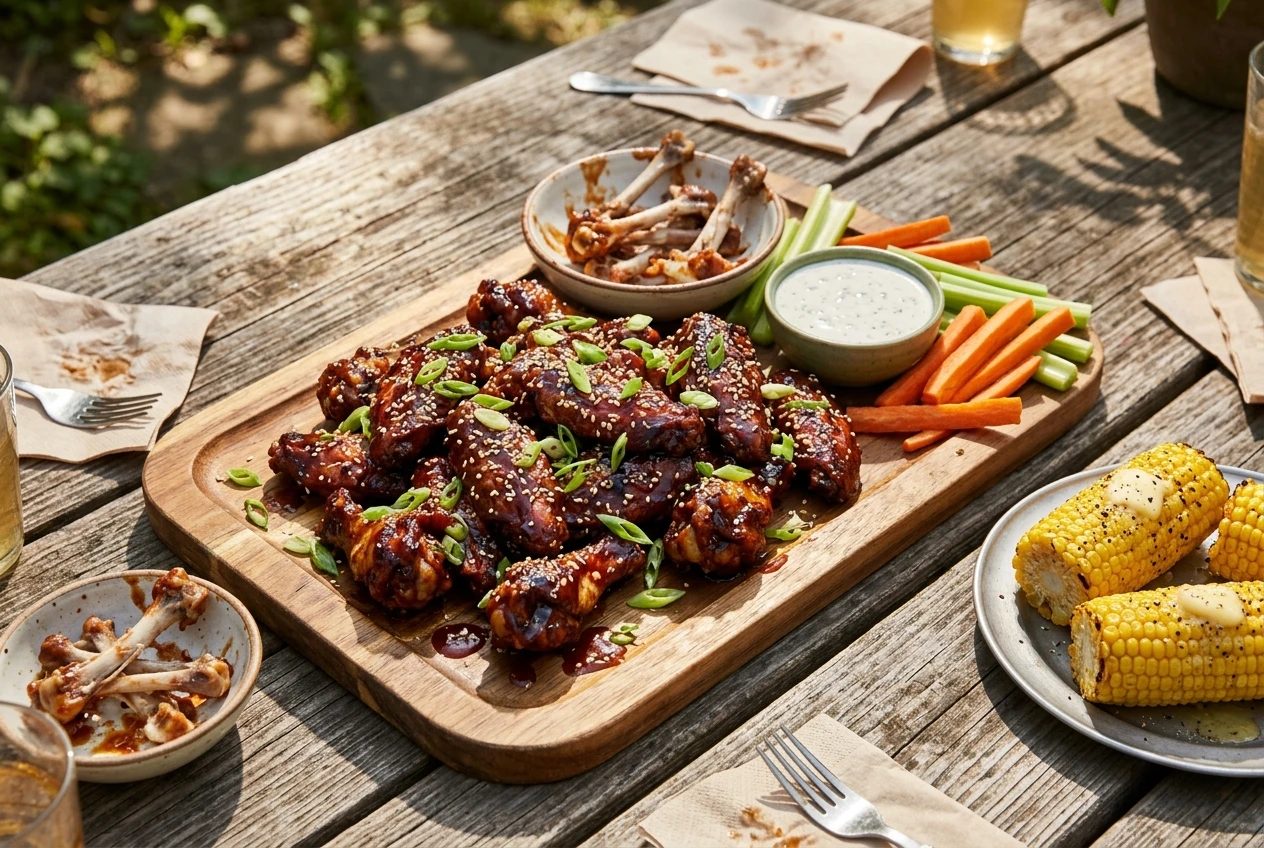
Pile the wings on a large platter or in a shallow pan lined with parchment, and keep a bowl nearby for the bones. A sprinkle of chopped parsley, sliced green onion, or sesame seeds adds color. Put out plenty of napkins, and consider wet wipes as well.
Dips and sides
Wings are rich, so sides that are cool, crunchy, or tangy balance them well:
-
Celery and carrot sticks with ranch or blue cheese dressing
-
Coleslaw, either creamy or vinegar-based
-
Potato salad
-
Corn on the cob, which can cook on the grill next to the wings
-
Baked beans or macaroni salad for a heartier spread
If you are feeding a larger group, a mix of sauces on the side lets guests choose their own heat level. Mild, medium, and hot give everyone a choice without you needing to cook multiple batches.
Drinks
A cold lager or pilsner is a classic match because it is light and refreshing against spicy sauce. Iced tea, lemonade, and sparkling water are good non-alcoholic options, and the acidity in lemonade helps cut through the richness of the wings.
Hosting is easier when most of the work is done before guests arrive. The wings can be seasoned the day before, the sides can be made ahead, and the grill only needs your attention for the last half hour. For more on running a relaxed cookout, see our bbq hosting tips.