

Most gas grills don’t fail because the burner finally wears out. They fail because small problems stack up quietly for a couple of seasons until the grill either won’t light, won’t heat evenly, or starts leaking gas at a fitting nobody ever checked. A grill that gets the right attention at the right times can run well past the point where most owners give up and replace it.
This guide covers the full maintenance cycle: what to do after every cook, what to deep-clean a few times a season, and what to check once a year before the problems become dangerous instead of just annoying.
Why Most Gas Grills Die Years Before They Should
The average gas grill is rated to last somewhere between five and fifteen years, but a lot of them get replaced after three or four. The usual culprits aren’t dramatic. Grease builds up in the bottom of the firebox until it rusts through the metal. Spiders build nests inside venturi tubes over winter, blocking gas flow and causing flashback fires at the burner ports. Hoses crack from UV exposure and nobody notices until there’s a gas smell at the connection.
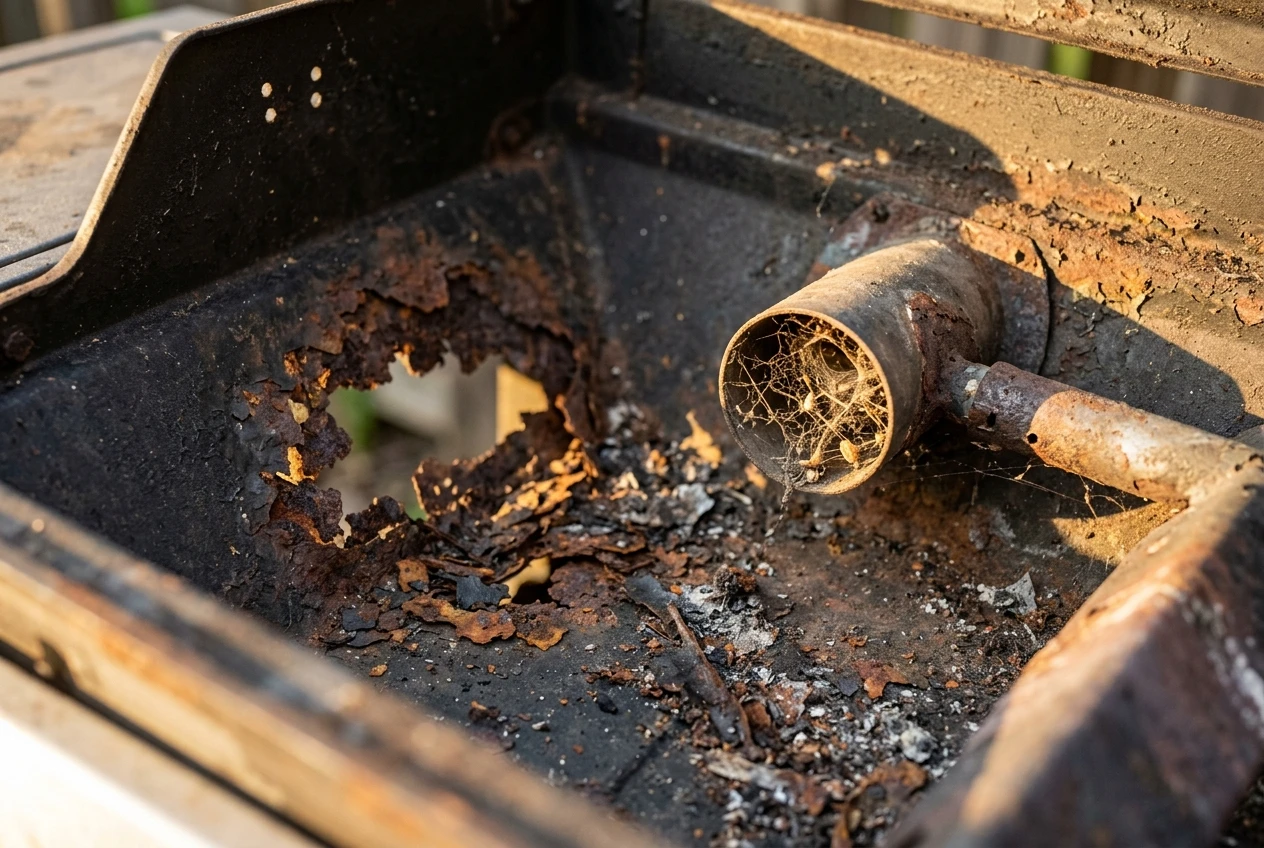
None of these are hard to prevent. They just don’t get done because most grill advice stops at “wipe down the grates and brush the grease tray,” which handles the cosmetic stuff but ignores the parts that actually cause failures. A grill that gets real maintenance, not just cleaning, holds its heat distribution, its ignition reliability, and its safety margin for years longer than one that only gets wiped down.
The Five-Minute Routine to Do After Every Cook
This is the one habit that prevents most of the bigger problems down the line. Right after you finish cooking, while the grill is still warm, close the lid and turn all the burners to high for 10 to 15 minutes. This burns off most of the grease and food residue clinging to the grates and flavorizer bars, turning it to ash instead of letting it harden into a sticky layer.
Once that’s done and the grill has cooled a bit:
- Brush the grates with a grill brush while they’re still warm, when residue comes off easiest.
- Empty the grease catch pan or tray if it’s more than a third full. A full tray is a flare-up waiting to happen.
- Wipe down the exterior if you cook in a coastal or humid area, since salt air and moisture accelerate surface rust on lids and control panels.
- Check that the lid is closed and the gas is off at the tank, not just at the control knobs.
None of this takes more than five minutes, and it’s the difference between a grill that needs a real deep clean twice a season and one that needs it every few weeks.
Deep-Cleaning Burners and Venturi Tubes Without Bending Them
This is the step almost every basic maintenance guide skips, and it’s the one that actually prevents uneven heat and failed ignition. The venturi tubes are the metal tubes that run from the control valves to the burners, mixing gas with air before it reaches the flame. Spiders and insects are drawn to the smell of propane and will build nests inside these tubes, especially over winter or any stretch of a few weeks without use. A partially blocked tube causes weak, yellow, or uneven flames and can cause a flashback, where the flame burns inside the tube instead of at the burner.
Every couple of months during grilling season, and always before the first cook after winter storage, pull the grates, flavorizer bars, and burners out to check the tubes. A venturi brush, which looks like a long thin pipe cleaner with a brush on the end, is the right tool here. Running one through each tube clears blockages without bending the tube out of shape. Don’t use a wire coat hanger or anything stiff and improvised. It’s easy to dent a tube or punch a hole through thin burner metal, which turns a cleaning job into a parts replacement.
While the burners are out, check them directly for rust. A light surface rust is normal and can be cleaned off with a wire brush. Rust that’s eaten through the metal, leaving pinholes or flaking chunks, means the burner needs replacing. A burner with holes in the wrong places won’t distribute flame evenly no matter how well everything else is maintained, and it’s a common reason grills develop hot spots and cold spots that no amount of grate cleaning fixes.
If you’re also running a griddle attachment or a flat-top alongside your grill, the cleaning habits are different enough that it’s worth keeping them separate. The How To Clean Blackstone Griddle guide covers that side of things.
Checking Hoses, Regulators, and Fittings for Leaks
The gas hose connecting the tank to the grill is a rubber or rubber-composite line, and rubber degrades with UV exposure and age regardless of how well the rest of the grill is cared for. A cracked, brittle, or soft and spongy hose is a safety issue, not a cosmetic one, and it should be replaced rather than patched or taped.
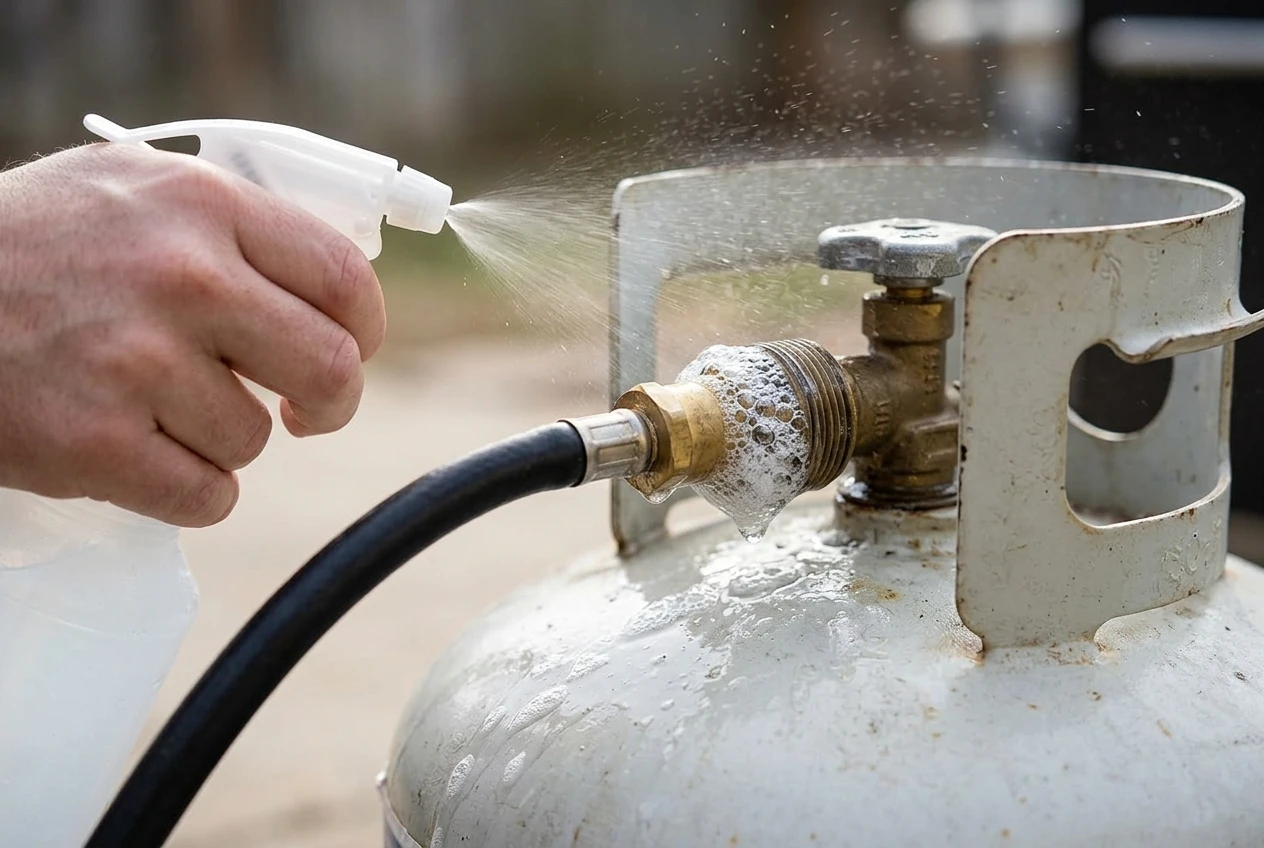
A simple leak check takes a few minutes and should happen at the start of every season, and again any time you reconnect a tank or swap a part:
- Mix dish soap with water in a spray bottle.
- With the tank valve open and burner knobs off, spray the solution on the hose, the regulator connection, and the fitting where the hose meets the tank.
- Watch for bubbles forming. Bubbles mean gas is escaping at that point.
- If you find a leak, tighten the fitting first. If bubbles persist after tightening, the hose or regulator needs replacing. Don’t grill with a confirmed leak.
Regulators themselves can also fail, usually showing up as a weak flame across all burners even with a full tank, sometimes called “regulator lockup.” If you’ve ruled out a clogged venturi tube and the tank isn’t empty, a stuck or failing regulator is the next thing to check.
Grease Trap and Drip Pan Habits That Prevent Flare-Up Fires
The grease management system, whether it’s a simple catch pan or a full tray-and-bucket setup, is one of the most overlooked fire risks on a gas grill. Grease that pools and hardens in the bottom of the firebox doesn’t just smell bad and smoke up your next cook. It’s fuel sitting directly under your burners, and a stray flame or spark can ignite a grease fire that’s much harder to control than a normal flare-up.
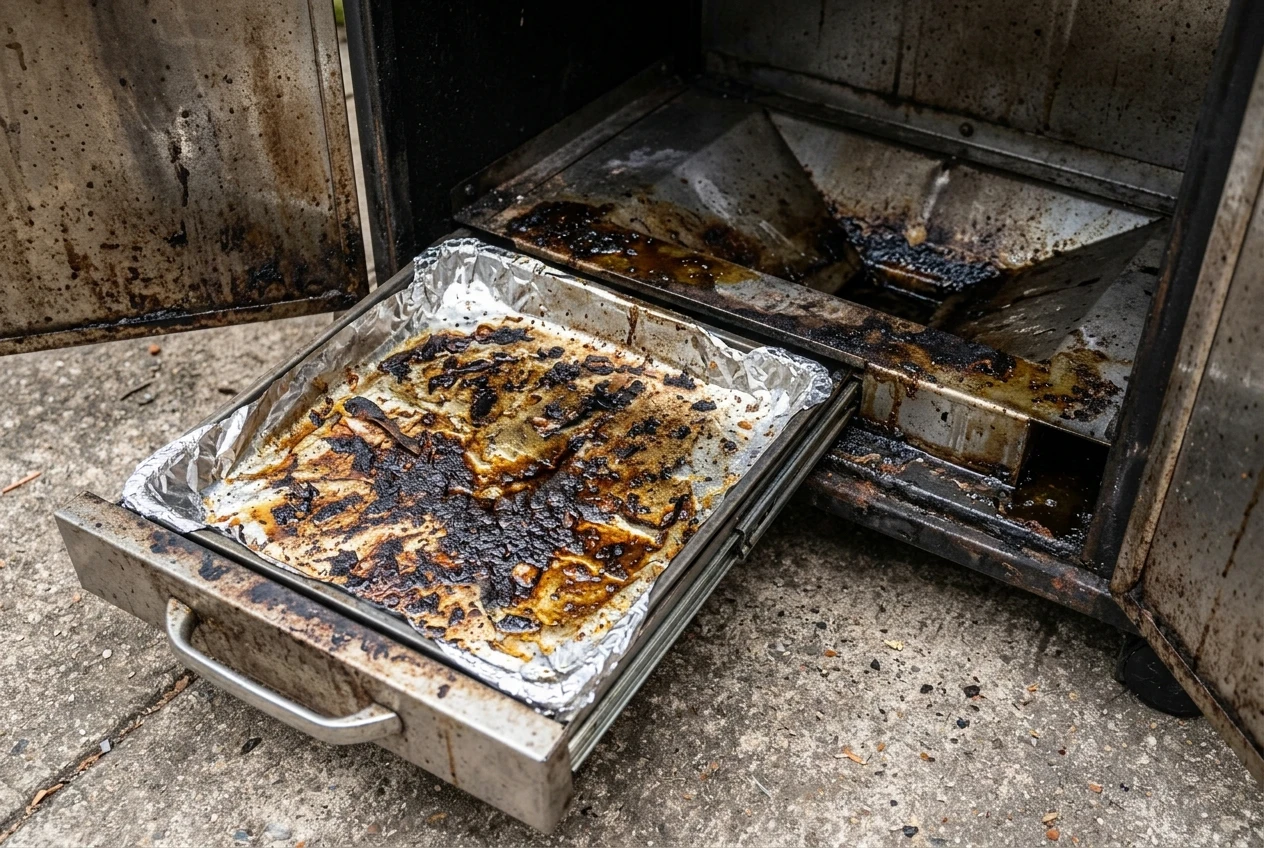
Empty the grease tray regularly rather than waiting until it’s full, and line the catch pan with foil if your grill allows it, since that turns a scraping job into a fold-and-toss job. A few times a season, pull the pan and bars completely out and scrape the floor of the firebox itself, where grease tends to pool in the corners away from the main drip path.
If flare-ups have been a recurring issue regardless of how clean the grease system is, it may be worth reviewing cooking technique alongside maintenance. The Direct Grilling Techniques guide covers how fat rendering and flame contact interact, which matters as much as a clean firebox for keeping flare-ups manageable.
Winterizing and Off-Season Storage That Stops Rust
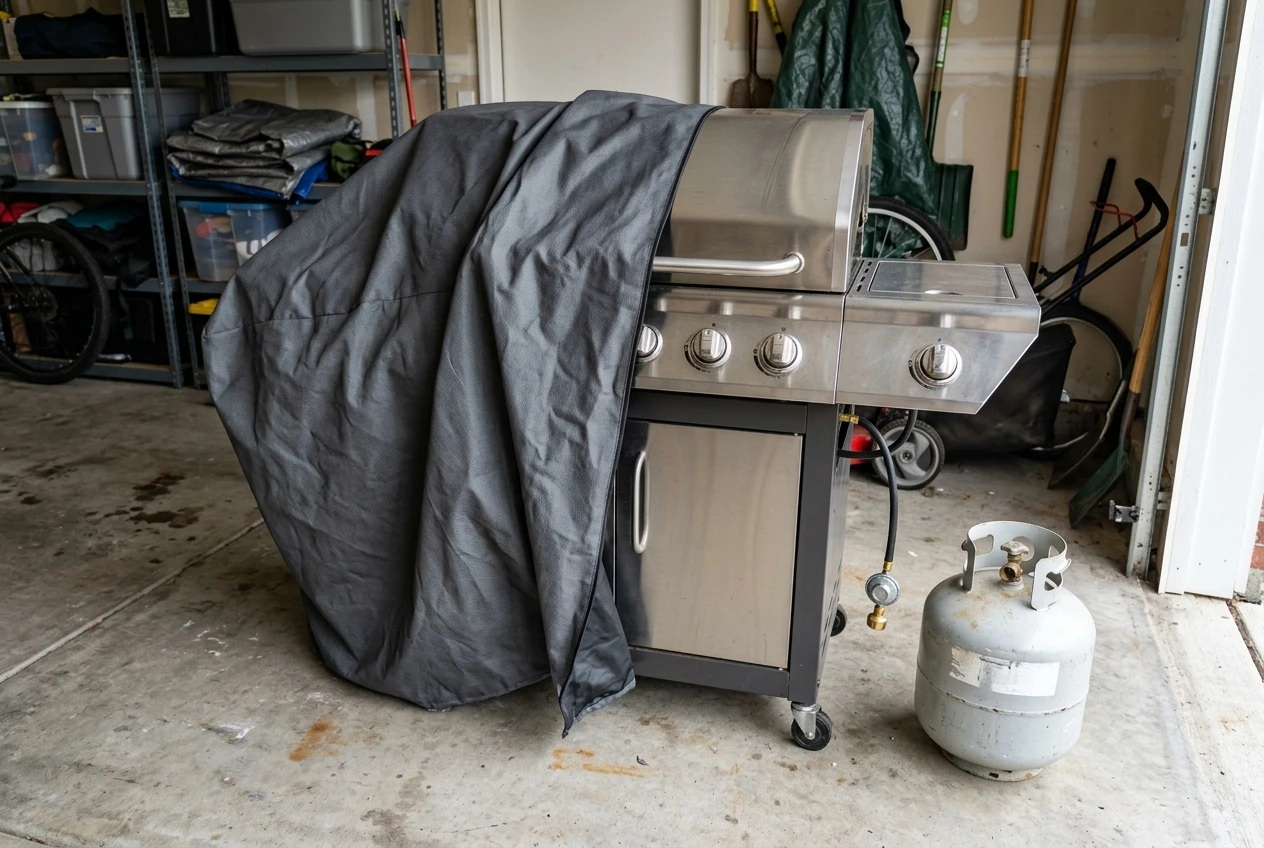
A grill that sits unused for months, whether through a full winter or just a stretch of bad weather, needs a bit of prep to avoid starting the next season with rust damage and nesting insects in the venturi tubes.
Before storage:
- Run a full cleaning cycle: grates, flavorizer bars, burners, and firebox interior.
- Empty and clean the grease tray completely, rather than leaving old grease to harden over months.
- Disconnect the propane tank and store it outside, upright, away from the grill itself.
- Cover the grill with a fitted cover that breathes. A cover that traps moisture against the metal can cause more rust than no cover at all.
- Plug or cover the burner tube openings loosely to discourage insects looking for a winter nest, without fully sealing them in a way that traps moisture.
If your grill lives somewhere with real humidity or coastal salt air year-round, rust prevention isn’t just a winter task. Check exposed metal and hardware for surface rust every month or two regardless of season, and treat it with a wire brush and a light coat of high-heat grill paint or oil before it spreads.
A Month-by-Month Maintenance Schedule You Can Actually Stick To
A maintenance plan only works if it’s simple enough to actually follow. Here’s a realistic cycle for an owner who grills regularly through the warmer months:
- After every cook: Burn-off, grate brush, grease tray check.
- Monthly during grilling season: Full grease tray empty and clean, exterior wipe-down, quick visual check of hoses and fittings.
- Every two to three months: Venturi tube check and clean, burner inspection for rust or holes.
- Start of season: Full leak check with soap and water on hose, regulator, and tank fitting. Deep clean of firebox interior.
- End of season: Full teardown clean, tank disconnect, cover and store.
Sticking to even the after-cook routine and the start-of-season leak check puts most owners well ahead of where the average grill ends up after a couple of years.
When a Repair Isn’t Worth It Anymore
Some problems are worth fixing. A cracked hose, a stuck regulator, a clogged venturi tube, even a single rusted-out burner, are all replaceable parts on most grills and usually cost far less than a new unit. Replacing one or two burners or a hose is a reasonable repair on a grill that’s otherwise structurally sound.
Rust through the firebox itself, the main body of the grill, is a different story. Once the floor of the firebox has rusted through in multiple spots, or the cart and frame are rusting at structural joints, you’re looking at a safety issue and a repair that often costs close to what a new mid-range grill would cost. At that point, replacing individual parts is just delaying the same decision.
If you’re at that point, the Best Gas Grills 2026 roundup covers what to look for in a replacement that’s easier to maintain long term, including build quality details that affect how long the next one lasts before you’re back here again.